Home Blog Page 31

How to Play World of Warcraft in VR

0

World of Warcraft is really a classic, and it has to occur to anyone who has used VR to play WoW in VR.

But is it really possible?

After years of tweaking games and software, if there’s one thing we’ve learned, it’s that everything’s possible in the digital universe.

Of course it’s possible to play WoW in VR

Here are the (rather naive) reactions of one guy who did…

So that was with the Rift

It turns out you can play WoW with just about any VR headset on the market, even with a cheap Google Cardboard clone. Actually, there are a lot of ways devised by a lot of people to play WoW in VR, but not all of them run smoothly. Some demand a very high end PC, which is a little ridiculous, since one thing about WoW is that it was devised to run smoothly on just about any PC.

VR would double the specs, since a different image is being created for each eye, but it still shouldn’t lead to dropped frames and such. But anyway, we’ll be giving you our solution to playing WoW in VR – if you want to try something else, feel free to do so. There are a lot of people out there putting up solutions to this, and YouTube is a great place to get started if you want to explore different options.

A journey to – literally – another world

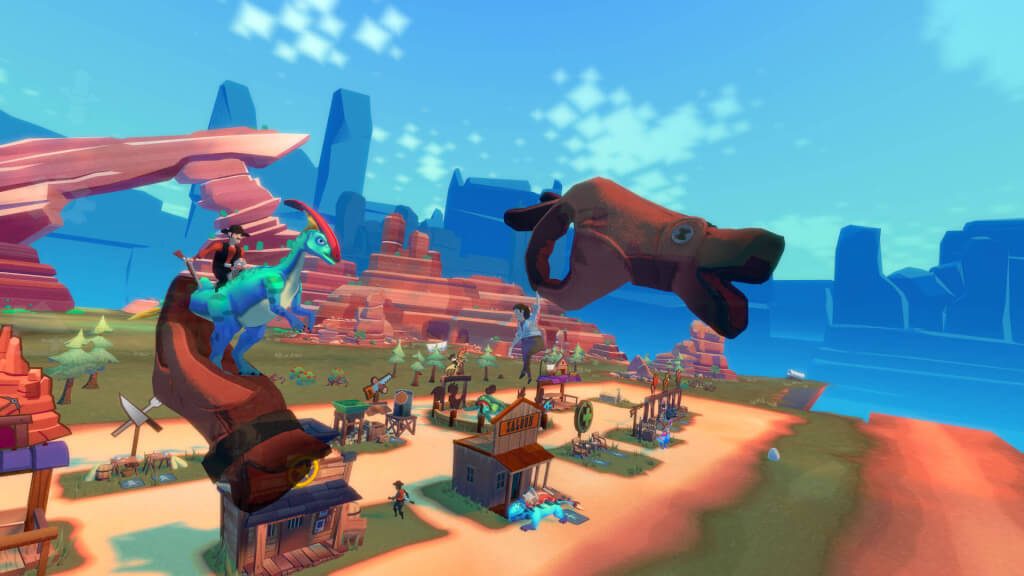
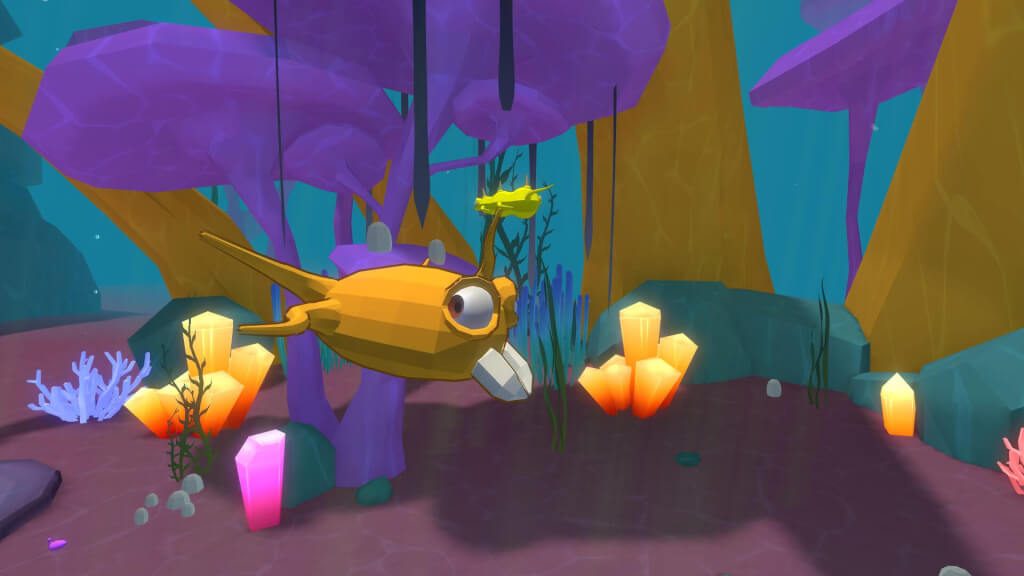
But before we go on to the technicalities of playing WoW in VR, let us tell you how amazing it was to fly around WoW in VR. We circled Blackrock mountain and flew out of the sewers. While WoW can feel dated on a conventional monitor – it is an old game, after all – it feels just incredible in VR. After all, World of Warcraft is literally a whole realm rich in imagination and detail…

VR really brings out the scale of all that

Circling Blackrock mountain, we could really feel the size of the mountain.

Then we flew over villages in-game, seeing characters and NPCs move around. Amazing. We took a mount across a forest, and once again there was a real sense of scale and distance, with the trees reaching out for miles. You have a real feel for how big the forest is in VR. Miles of leaves, with a break here and there where there’s a farmhouse. And Draenor was incredible, of course. If you try this, you definitely have to see Hellfire Citadel, with it’s incredible fires.

Anyway, everything that we’ve been saying are, after all, just words

If you have a VR headset, and are a WoW fan, this is something you have to experience for yourself. The conventional monitor just doesn’t bring out the scale and detail of the game like VR, or do it justice.

And, that said, let’s get down to the technicalities of playing WoW in VR.

Trinus VR

This program is really the holy grail of transferring older games to your VR headset. It even includes an android app so that the cheaper mobile-based VR headsets can also be used to transfer games to VR. The Trinus apps are free to use, with certain limitations on the trial versions that are not there in the paid version. However, since we didn’t run into any of these limitations, it seems the trial version is really very functional. You can get the Trinus app at their website.

Setting it up is very easy

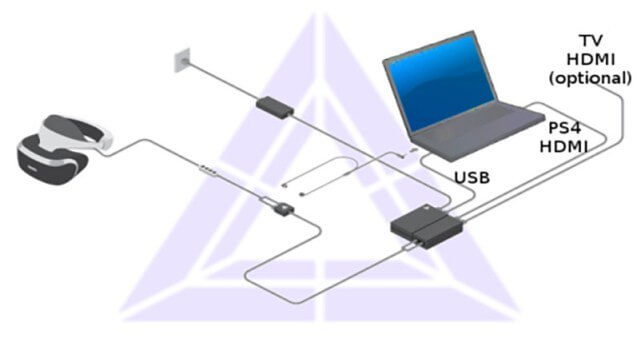
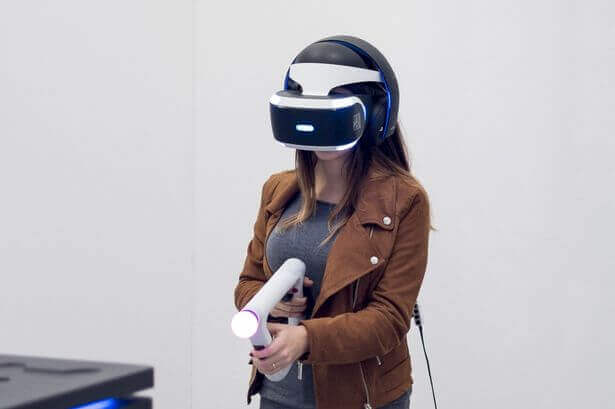
Install the PC app if you have a PC based headset like the Rift. If you have a PSVR, Trinus has an app for that as well! If you have a mobile based headset, install the Trinus VR Lite app. You can get that at the Playstore.

You just have to connect your headset to your PC and tell Trinus to ‘connect’ them

Once the app is up and running, you may have to tweak a detail or two – one thing that requires a little tweaking is ‘image scale’, which we set to Ultra, and with compression maximized. Beyond that, nothing more is required – just press play, and Trinus will begin to stream the screen of your active app to your headset.

The next steps are pretty self-obvious

Just start up WoW. One tip here is to run it as a window. For some reason, it didn’t work too well in full screen mode. You’ll also need to tweak settings so that you get at least 60 fps. Just lower the graphics settings until you get a steady 60fps. It shouldn’t be hard, because WoW has been built to run on minimal settings if necessary.

But if you don’t get the minimum frame rate, you might suffer from some serious motion sickness, a common problem in VR at low frame rates. It’s better to accept lower graphical settings and smooth movement, rather than high graphics settings and stuttering frames.

This macro should help you quite a bit:

/run if IsMouselooking() then MouselookStop() SetBinding(“BUTTON1″,”CAMERAORSELECTORMOVE”) SetBinding(“BUTTON2″,”TURNORACTION”) else MouselookStart() SetBinding(“BUTTON1″,”STRAFELEFT”) SetBinding(“BUTTON2″,”STRAFERIGHT”) end

You’ll need to set a convenient key to trigger that macro, which will allow you to use mouselook to control your head movements. This makes looking around far more convenient.

That’s all that you need

Just about any headset that can handle VR can handle WoW, with a minimum of friction. WoW is charming because it has a very distinctive art style that really lends itself to VR, all the cartoonish graphics and the wealth of detail go down surprisingly well when you view them through a VR headset.

How to Play Rocket League in VR (Guide)

0

It’s easy to play Rocket League in Virtual Reality. All you need is a specific app called Bigscreen, that lets you play the game in VR. After that, the game is a breeze – Rocket League really lends itself to VR, so, once you get Bigscreen up and running, you can jump into the game right away. Just tweak the settings so that you get the right frame rates, and you’ll have a great experience.

Bigscreen

You’ll need to download the Bigscreen app, which is also available on Steam. Since the app is for the Oculus Rift, this will work best with the Rift. You’ll also need a high-end PC or laptop. Bigscreen has its own draw on your PC’s resources, and this may affect your in-game experience with Rocket League. We’ll go into that in more detail a bit later. For now, just install the Bigscreen app, fire it up, and you’re good to go.

Getting started with Rocket League

As we’ve mentioned, this game will be unplayable unless you really have a VR-ready PC or laptop. Above all, this means having a graphics card that is GTX 1060 equivalent, or above. Rocket League is not a game that can support smooth VR on a low-end PC, and if you try it, you’ll end up with dropped frames, and that classic feeling of VR-induced nausea.

It’s best to head over to the settings panel before you fire up the game, because this allows you to tweak the game for optimal performance. You can start out with a resolution of 1920 by 1080, and make sure that the screen ratio is 16:9. The window mode will, of course, be full screen, and VSync will be enabled.

Tweaking the game settings to get the right fps

Now we come to settings that you can tweak if you don’t achieve frame-rates that are easily above 90 fps.

Disable High-Quality Shaders and Motion Blur – these are worthless, resource-eating effects. Set the World Detail to Performance mode right at the start. Ambient Occlusion, Bloom, Depth of Field, Light Shafts, Dynamic Shadows, Lens Flares and Weather Effects are all things you can enable at first, but they’re also useless eye-candy, so you can try turning some of them off if you’re seeing dropped frames.

Advanced settings

There’s texture detail, which you can start out by setting to High, but which you can lower if you find frames dropping. The same goes for the ‘Render Quality’ setting – you can set it to High at first, but lower it if you have problems. Then we come to anti-alias, always something to tweak if you’re getting skipped frames, or less-than-smooth VR. Start out with a setting of FXAA Low, and lower it further if you have problems.

Do not touch the Render Detail setting, as it globally changes all the other settings, which will ruin your careful tweaking. Set the maximum fps to 90 – you don’t need more than that anyway.

How to play Rocket League in VR 01

Bigscreen’s demands

The thing is, Bigscreen has its own resource requirements, and when you let a game use most of your PC’s power, Bigscreen then has issues rendering into VR. Having a high-end PC is crucial, but so is being sensible with game settings, and ensuring that you leave enough resources to spare so that Bigscreen can function efficiently.

If you’re still having issues, some of the most important tweaks you can put in in-game are enabling VSync, and ensuring that you set the maximum required frame rate to 90 fps. This is especially important, as while ensuring that you reach 90 fps is important, it’s also important to cap the FPS at that point so that any excess PC resources can be diverted to Bigscreen.

The Bigscreen VR environment that you’re using also matters. Cinema or even Living Room are demanding environments, while Void is more geared towards performance. Removing the super-sampling option in Bigscreen is also a big help, as it really is a resource-hog.

VR Laptops

If you’re using a VR capable laptop, and are having problems, the first thing you need to check is whether your laptop’s Power Saver mode isn’t active, as this massively affects performance even if you’re using the laptop on mains power. Your laptop must be using the High Performance option.

Origin EON17-SLX

Finally, if you’re still having problems after this, you need to ensure that your graphics card drivers are properly updated, and also that you disable NVIDIA’s resource-hungry overlay options (such as GameReady). But it’s unlikely that you’ll have any such issues – just tweaking the game options will let you play Rocket League smoothly the first time around.

Bigscreen is a versatile program that can be used, not only for Rocket League, but to port a score of other PC games to VR, and as such is an indispensable way to extend and improve the range of your VR experiences, as well as to ensure that you get your money’s worth from that expensive VR headset.

How to Connect and Use PSVR With a PC

0

Sony has done very well in their advance into virtual reality. The design of their headset is by far the best and most user-friendly, as well as the easiest to ‘get out of the way’ when you want to return to the real world. This is in considerable contrast to devices like the Oculus Rift, in which a return to the ‘real world’ means removing the entire headset.

For those of you who love the power and versatility of the PC, Odd Sheep Games have developed a system of connecting a PSVR to a PC. The software that does this is called Trinus PSVR, and it opens gateways to a universe of possibilities. I’m sure you’re imagining some of those possibilities right now. In case you have problems with that, here’s a video to help you out…

Not only can you play PC games or your Steam library on your PSVR if you install Trinus PSVR, but you can watch VR movies on the headset as well, or 360 degree videos. If you own a PSVR, here’s how you can go about using Trinus to connect it to your PC.

Here’s what you’ll need to connect a PSVR to a PC

We’ll assume that you want to play Steam games. So you’re obviously going to need a Steam account, and SteamVR. You’re going to need the Playstation VR, of course, and you’ll need to download Trinus PSVR and then install it on your PC. Trinus PSVR comes with a free trial version. If you like it, you’ll have to buy the full version. It’s not very expensive, at around 15€.

Setting up the connection between the PSVR and the PC

Obviously, before you start to play, you need to get the physical setup right. It’s not difficult. You’ll need to connect the processing unit to the PC first. This is done with an HDMI cable. One end plugs into the processing unit’s PS4 HDMI port, and the other end will go into the PC’s HDMI port. You’ll also need a USB connection between your PC and the processing unit. You’ll need a USB to Micro-USB cable for this. The processing unit takes one end, and the other goes to the PC’s USB port.

PSVR PC Trinus

That’s the PC to processing unit part of the connection done. Now you simply plug the PSVR headset to the processing unit using the usual connections. Plug in the processing units power, and power up the setup. You’re good to go, as far as the hardware is concerned.

Setting resolutions

Trinus requires your monitor resolution at 1080p. Before you set the resolution, and do a few other necessary things, you need to ensure that the PSVR is powered up. Now, bring up the display settings on your monitor by right-clicking anywhere on your desktop. Select ‘Multiple Displays’, and select ‘Extend displays’. After this, in the Advanced Display Settings, select 1920 by 1080 for your screen resolution. Apply these settings, and your resolution and display have been set to be compatible with Trinus.

PlayStation-VR

Setting up Trinus PSVR

You’ll have to configure Trinus first. To do this, you’ll need to right click the Trinus icon, and then run the program as an Administrator.

When the program opens up, you’ll find that one of the tabs is ‘Install’ – you’ll have to click this tab. When you do this, Trinus will search for – and find – the folder where you have installed Steam.

Once that’s done, click on one of the other tabs, marked ‘Main’. You’ll see a dropdown menu at the item PSVR Display. Click on it, and a list of displays will appear. You’ll need to click on DISPLAY1.

Now, just under that, is PSVR Mode, which also has a dropdown box. Click on that, and click on the option VR. There are other options here that can also be used. The Cinematic option is basically for watching movies, or playing 2D (as opposed to 3D) games in VR.

If you’re still confused, here is a step-by-step video to help you out…

Assigning some important controls

This is where you’ll also assign a key to reset your view in the PSVR if necessary. There’s a button right there in the Main Tab that says, simply, ‘Assign Key’ – just click on that, and then press a keyboard key to establish a shortcut that will reset the view for your PSVR if it becomes necessary.

There’s another important control you’ll want to set here. There’s a check box that allows you to use the mouse wheel to zoom in or out in-game. Just make sure the check box marked ‘Use Mouse Wheel’ is ticked, and this option will become available.

PSVR Turtle Beach 350vr Headphones

Calibrating the PSVR Headset

We’re almost done. All we have to do now is calibrate the PSVR headset. You’ll need to set it down on a perfectly flat surface. This is very important, so make sure you do this right. Start up Steam by right clicking on the Steam icon on your computer, and running it as Administrator. Now, in Steam, click on VR, and then on the option to ‘Run Room Setup’. Here you’ll need to select the option for ‘Standing Only’, and click on the button ‘Next’.

Now, click on the option that says ‘Calibrate Center’, and hit the button ‘Next’. The height calibration will come up next, where you simply have to enter your correct height. Next you’ll calibrate the floor – just follow the simple instructions on the screen, and hit ‘Next’. And then click on ‘Done’, and you’re good to go. Simply press the Windows key plus Shift plus the Right Arrow, and the headset display will immediately be visible on your PSVR, which will now operate pretty much like a Vive or Rift. Just fire up a Steam virtual reality game, and have fun on your PSVR.

A mouse, keyboard or other controller can be configured for individual games by bringing up the game’s window on your monitor display, and configuring the game’s controls there.

Common bugs with Trinus

Like all bridge-apps between two integrally different systems, there are minor things that can go wrong with a Trinus setup. Here’s how you can handle any bugs that crawl out of the woodwork when using Trinus…

Dealing with Bugs
Right, right, just kidding.
Seriously, now, here’s how you deal with Trinus bugs…

Tracking problems and issues with drift

Issues with tracking or drift are the most common issues with Trinus, and can usually be linked to not following the installation process exactly. Just make sure that the headset rests on a stable and flat surface when you’re going through the setup and calibration process, and you won’t encounter these problems.

Getting the best clarity from your PSVR

There’s a slider in the main tab marked IPD that can help bring images into perfect focus in VR. Since you’ll have to see both the slider and the VR screens inside your headset to do this, you’ll have to hold your headset ‘half down’ so that you can see both your PC’s monitor and the screen displays inside your headset. A bit inconvenient, admittedly, but the clarity at the end of this process is well worth it. All you have to do is move the slider back and forth until the picture becomes perfectly clear.

Farpoint-PSVR

It’s perfectly possible to use Trinus with your PSVR to play virtual reality games meant for the PC. This gives you the best of both worlds, since you can access programs made for both the PlayStation and the PC.

5 Best Godlike VR Games

0

If you’re a proud owner of a VR headset, you must already be amazed by the opportunities it offers, as well as by innovative new applications and games that are being released daily. VR environment gives you something unlike any other platform out there. You are put in a virtual 3D environment and free to do whatever you like.

It is no wonder then that there are VR games putting you in a position of a deity, with godlike powers at your discretion. The feeling of power you get while playing such a VR game cannot be compared to any other game on any other platform. Craving a daily dose of power trip, we dug deep, far and wide to find only the best of these. So, without further ado, here are top 5 godlike VR games.

1. Dino Frontier

First on our list is a PSVR title that puts an interesting little twist on a classical city building game. You are in charge of a small town on the outskirts of the wild west with some unusual neighbors in the form of dinosaurs! Well, who would have thought of combining cowboys and dinos, but it sure works and is a helluva fun!

The objective in this game is to grow your town, develop buildings, maintain the economy, all the usual town building stuff. The best part is capturing and taming dinos who will make a valuable addition to your town’s population. Some of them are very useful for the economy and infrastructure. They water the crops, help you harvest resources, while others, like the apex predator T-rex, are useful for protection.

The predators are especially important when your arch nemesis in this game, the Bandit King, decides to stroll down the valley and with his own army of dino minions to loot and pillage treasures you have meticulously obtained.

Oh hello there little Dino…

The game is very hands-on in its approach. It is recommended that you do most of the management since that will be the best way to ensure your victory. However, other than the feeling of growing your own little personal town, there aren’t that many powers giving you the feeling of the omnipotent being.

The other downside to this game is its short duration and the lack of replayability. After you have defeated the bandit king and tamed all the dinosaurs, there is really no incentive for you to continue playing, which is a shame since the game is very well polished and very engrossing. One thing’s for sure – seeing those little dinosaurs grow makes my heart warm.

DOWNLOAD: PSVR

2. Tethered

Here comes another title for PSVR, also released for HTC Vive and Oculus Rift about a year ago. Tethered is a game that provides a bit more of that awesome omnipotent feeling in this resource management game.

You are put in the boots of the benevolent being who has an island to manage with the help of little creature called “Peeps”. They literally fall from the sky in the form of an egg. You, as their supreme leader, are in charge of issuing them various tasks, such as collecting and mining resources and building structures.

The main objective is to collect Spirit Energy which can be done in various ways. You can collect crystal which is the condensed form of said energy. You can also kill critters that come at night trying to whack your little Peeps and steal your resources. You didn’t think it would be that easy, did you?

The name of this fun little game comes from its mechanics. You assign your Peep to do your bidding by tethering him to a certain task or structure. Tethering is also done when you usher your godlike powers and renew certain resources by tethering a cloud of magical energy which replenishes some of it.

Look at those cute little furballs…

Although the game looks simple and the premise is pretty straightforward, if you do not keep tabs on your little minions, things could get out of hand. Peeps can easily starve or get decimated by the critters spawning at night, which can easily push the remaining ones to go into frenzy and they start jumping off the island, straight into the bottomless pit of their demise. Now, that would be very irresponsible for a supreme being, wouldn’t it?

After you have collected sufficient amounts of Spirit Energy, the level is completed and you are sent to the next island. There are 13 islands in total, where you mostly do the same stuff, so the variety is a bit lacking. Other than that, the game is quite polished, with beautiful graphics and nice background music featuring Celtic overtones.

DOWNLOAD: Steam | Oculus Store | PSVR

3. Deisim

Here is a game which truly simulates the feeling of godlike powers. The start of the game is simply engrossing. You begin in the endless space and you are free to grow your world as you see fit. Put different tiles on the map, grow your world and it will adjust accordingly. Make lakes, marshes, forests, mountains. Cultivate the land space to your heart’s desire. Of course, what kind of a god would you be without the people to believe in you?

Do not fret, for you are provided with the humans who will do just that. If you take care of your followers by protecting them from fires and helping them build a civilization, you will be revered and worshiped properly.

Unfortunately, there will be some pesky heretics along the way. Now, why would you tolerate such insubordination in your world? My thoughts exactly. If you ask me, grab the nonbelievers and throw them into the endless abyss. Or simply smash them into the ground. There will be no heretics on your watch.

Yes…worship me, my minions!!!

Deisim combines the civilization management mechanics with the feeling of total omnipotence. This is emphasized by the fact that, when placed in the world of VR, you’re given much more freedom in controlling your environment, and you truly have a hands-on approach. You can move mountains, stroll around the earth and raise fires, or you can take a more laid-back approach and watch as your followers grow in population and technology.
The game really gives you the freedom to do as you see fit.

DOWNLOAD: Steam

4. Super Island God VR

As the title suggests, you are a god and there is an island which requires your attention. Do not worry, you won’t be doing most of the grunt work. Humans that worship you are there for a reason, but use their help wisely. Super Island God VR is more of a civilization management and city building game, although you are given certain powers such as replenishing forests and sending fireballs or rain. Whatever you prefer more.

Hopefully, you will use your powers wisely, since the objective of the game is to complete certain challenges per island. If you destroy everything you are kinda shooting yourself in the foot. It’s still fun wrecking everything though.

See that volcano over there? Someone is gonna visit it…upclose.

The downside of the game is that it really feels more like a management game than a true god game. Your powers are limited and you do not have absolute control such as you do in Deisim. Basically, you are a demigod.

Other than that, you should really pay attention to resource consumption and building placements. The space is limited and you might end up exhausting certain resource which will make you restart the game. Not only that, but there are certain limitations and dangers which you have to be mindful about too. For example, if you don’t provide a proper sacrifice to a volcano god, expect molten hot lava to wreck everything you’ve been working on. You’re not the only deity on the island.

All things taken into consideration, it is a very cool godlike city management game filled with lots of Easter eggs for you to discover. Your powers are certainly lacking and could be increased a bit, but it won’t stop you from having fun with it.

DOWNLOAD: Steam | Oculus Store

5. Evolution VR

Evolution VR is a Vive exclusive that puts new perspective and challenges in the life of a godlike being. It’s a spiritual successor of the game Spore, which puts you in charge of an organism as you guide it through the process of evolution. Everything happens underwater though.

Customize your little creature and guide it into the deep reaches of the sea. You will have to eat other creatures to collect DNA material. This will help you evolve in later stages, as well as avoid the nasty predators lurking below the surface.

The mission, of course, is to stay at the top of the food chain. To achieve that, you will have to carefully choose the evolution path to beat all the other fishes as you fight for the same resources.

I’m gonna call you Mr. Bitey…

The game presents its challenges in every stage. There will always be new body parts to unlock and intimidating creatures to fight. It’s a real shame that the game doesn’t last that long and goes beyond the stages of evolution after the underwater part.

DOWNLOAD: Steam


In this list we have brought you five games, each covering the different aspects of godlike powers and tasks. Hopefully, you will find a game that best suits your affinity. The world of VR is designed for games like this, and there are many more new opportunities for developing such games. We can’t wait for more great games in this genre. And you?

PSVR Tips and Tricks – Maximize Your VR Experience

0

Whether you are a fresh or seasoned PlayStation VR user, there are always some quality of life improvements you can implement which may enhance your overall experience. We gathered information about some fairly common, but also a few less known PSVR tips and tricks you may find useful.

Each of our suggestions aims to improve the level of immersion you get during your virtual reality sessions. Individually, they may not seem like much. However, these small pieces of the PSVR tips and tricks puzzle combined together make a formidable difference.

If you haven’t yet decided if PSVR is a virtual reality device of your choice, or if you are thinking about waiting for the next gen of PlayStation console before purchasing PSVR, read this article.

And now, without further ado, lets get on with VRBorg’s PSVR tips and tricks!

Camera and Tracking

A lot of talk has been going on about the PSVR camera and tracking. Critics have been merciless, and while users for the most time are ecstatic while talking about Sony’s virtual reality headset, most of them have encountered occasional tracking issues. Nevertheless, PlayStation VR has surpassed 2 million units since Fall 2016!

Basics

Firstly, let’s cover the camera setup basics. You need to place it on a slightly higher, vibration free surface. Official Sony’s recommendation is 1.4m (4’7″) from the floor or “slightly higher” if you are using PlayStation Move motion controllers. Setting PS camera up on a higher surface in some cases improves tracking. You should sit or stand directly in front of it, at a distance of about 1.4m-2m (4’7″-6′).

Dim the lights

PlayStation camera works by tracking LED-s on the PlayStation VR headset. When deciding which room to designate as your virtual playground, you should have in mind – the darker the better!

Whether it is the daylight, some LED-s other than the ones on your VR headset or just the room lights, all of the aforementioned can interfere with the PSVR camera and negatively affect the in game tracking. Your PSVR shouldn’t be exposed to direct sunlight while in use, so make sure to avoid this scenario. Any mirrors or smooth surfaces which may reflect any lights are unwelcome, as they also could “confuse” the PlayStation camera.

Re-calibrate the camera often

Unless you have a basement without windows which serves as your VR room, most likely you will be unable to completely block out the daylight. During different times of the day, the amount of sunlight entering your playroom will vary.

Due to these differences of brightness during the day, it is a good idea to re-calibrate your PlayStation camera, if possible before each session. This will ensure you get as accurate tracking as possible.

We hope these PSVR tips and tricks will solve the PlayStation camera issues you may have encountered.

Set the IPD carefully

IPD is abbreviation for interpupillary distance, or simply put the distance between the centers of your eyes. But you probably already know this. This can be done manually. Go to Settings-> Devices-> PlayStation VR. The headset measures the IPD automatically, but these measurements aren’t always pin-point accurate.

You can measure the distance yourself using a ruler, or with a help of a friend. Have in mind however that you’ll need a ruler with millimeter units. If you want 100% accurate measurements, visit an eye doctor. While your actual IPD value is important, feel free to fine tune it since some users report that setting it slightly wider or narrower than the actual distance positively influenced the video quality and reduced the eyestrain.

Talking about the eyestrain, you can use one of the simplest PSVR tips and tricks to reduce it. Simply lower the brightness level!

Besides sore eyes, improper setup of IPD may also lead to nausea and motion sickness, so make sure to fine tune it until you get the clearest image.

Charge up your  PlayStation Move Controllers

PlayStation move controllers aren’t really mandatory, but there are many games which you won’t be able to fully enjoy without them. If you are trying to figure out if they are worth buying, check out this article.

If you already own a pair of PlayStation Move controllers, before immersing into virtual reality, you should always fully charge them. If the Move Controllers aren’t fully charged, it may lead to in-game tracking glitches.

There is plenty of charging stations available on Amazon, like the one in the image above.

Play Demo Games before buying

Paying additional $50 per game on top of the $400 headset is something you may not be so happy with. Well, there’s nothing we can do about that fact.

However, to ensure no regrets after the money has already been spent, try out the game demos before making a purchase. The demo disc you get when purchasing PlayStation VR contains 18 virtual reality game demos, so there is plenty of trial versions to try out!

Peripherals are necessary for improved immersion

While move controllers are recommended, yet not necessary, buying a pair of headphones for improved immersion is almost mandatory. Check out our article on best headphones for PSVR in order to find a perfect pair for you.

Another peripheral you might consider buying is PlayStation VR Aim Controller. However, it is only compatible with the sci-fi shooter Farpoint. Support for other games has been announced, so you should probably wait out until you can play more first person shooters to get the most out of your investment.


We hope that our list of PSVR tips and tricks helps improve your overall experience. Game on!

Sincerely yours, VRBorg Collective