
With the advent of the first virtual reality headset, Oculus Rift, a whole new universe of possibilities has been opened. In the meantime, a lot of DIY enthusiasts have decided to take matters into their own hands and have produced HMD of impressive quality. But not one of them is so easily available and easily made as Google’s Cardboard VR, the template which is available for the public to use. Even though the plans are readily available, the instructions are so detailed that they might get confusing. With that in mind, we have made a complete step-by-step guide which is easy to follow and will reward you with a final product worthy of mentioning.
How does VR work?
Virtual reality is a technology that brings users into a virtual world quite unlike anything else experienced in front of a flat 2D monitor. VR has developed in such a way that it will not be a surprise if it starts to incorporate all of our senses, including vision, hearing, touch and even smell.
The only current problems are the availability and the price of such hardware, meaning for the best possible experience you have to spend a significant amount of monetary resources.
Luckily, Google has taken head-on that issue in an effort to increase the availability of VR technology to the wide populace with its Cardboard and Daydream ecosystem, of which we shall be using Cardboard as a means of ushering into the land of VR.
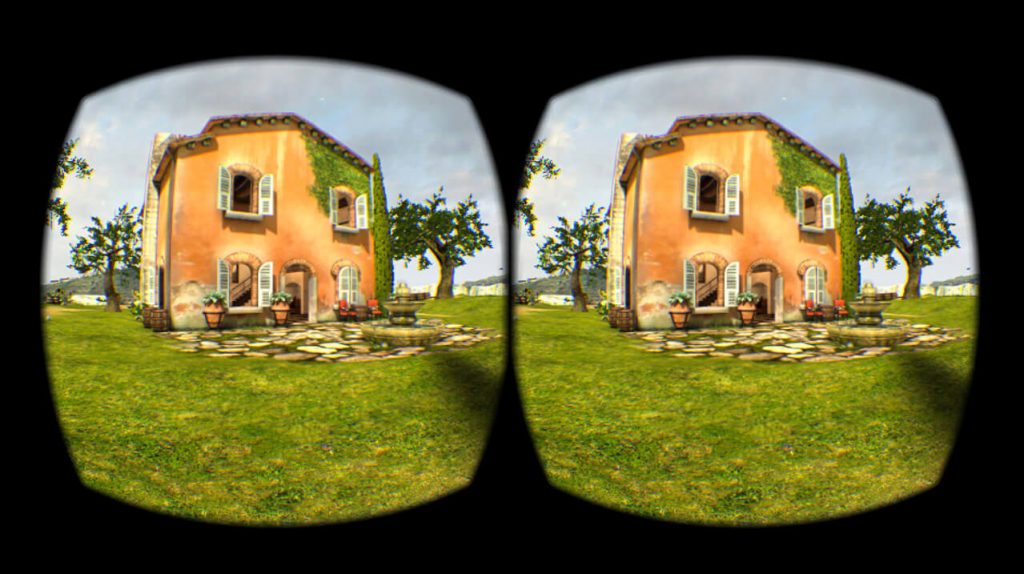
Virtual reality, in essence, tricks your brain into believing that you are in the real world. The main way VR technology does this is by using stereoscopic display.
You see, each of our eyes receives a 2D picture of the surrounding area from a different angle, and our brain works to complete them into a 3D representation of our world.
Stereoscopic imagery works in the very same way. Two slightly different angles of the scene are displayed for each eye, thus simulating a depth effect. Combined with the fact that farther objects relative to you move slower and shading works to create an almost lifelike experience!
The way stereoscopic screen look varies platform to platform as each headset displays images in its own unique way. More advanced VR headsets such as Oculus or Vive, use two feeds sent to LCD displays, one per each eye. There are also lenses which are placed between the eyes and the rendered image, which help to focus the picture for your eyes.
The lenses also reshape the picture for each eye by angling the 2D images to mimic better how each of our eyes views the world. Try closing your eyes, one at a time, and focus on a distant object to get the idea behind it.
Now, when you know a bit behind the technicalities of it all, we shall start with our guide to a DIY VR headset. By using this tutorial you will be able to make yourself your very own VR headset with no cost to you at all if you have some cardboard, plastic bottles, and magnets in your home. Velcro strip comes as an added benefit. You can practically build this headset with recycled materials, and consider yourself an ecological activist in the process.
The lenses are maybe the trickiest part of this tutorial since Google recommends you buy one which will be the costliest item on the list, but a very good solution is to make ones yourself using clear plastic. The lenses used in VR help reduce the least distance of distinct vision, since your eyes can’t focus on something very near to you, thus allowing you to see the screen of your smartphone quite clearly only a few centimeters off your face.
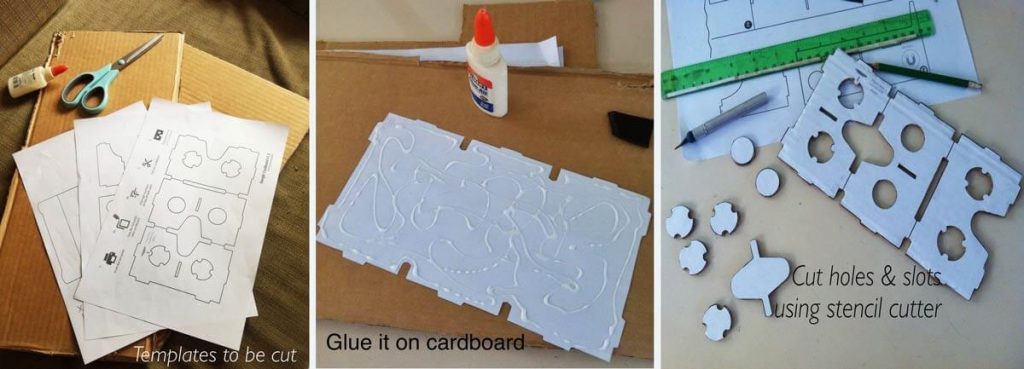
What you will need:
– Scissors
– Exacto knife (stencil cutter)
– Glue
– Quick dry epoxy
– Clear plastic bottle made of PET (Pepsi cola does the trick
– Velcro or rubber band (optional)
– Glue stick and a glue gun
– A small piece of dense foam
– Google Cardboard template
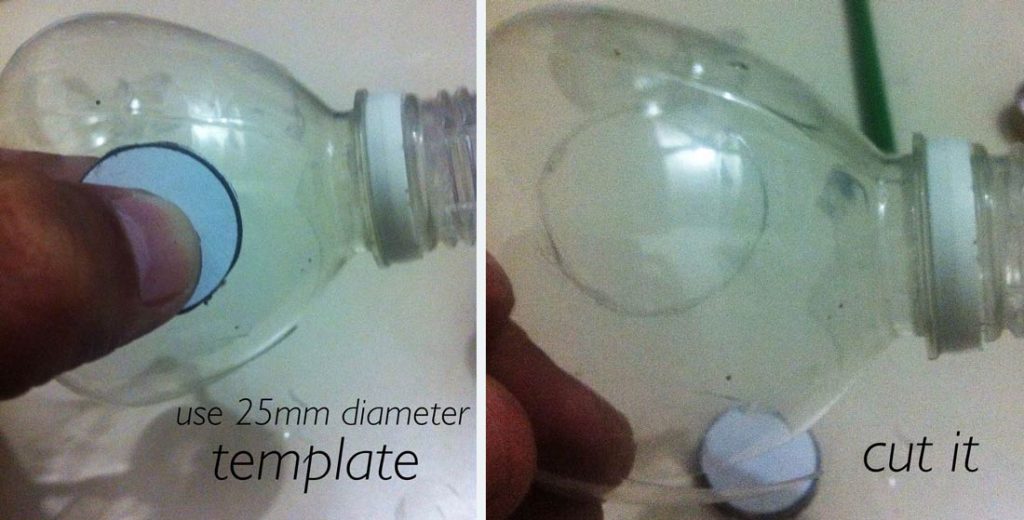
1. Cutting lenses
Find a bottle, preferably a large Pepsi cola bottle and cut away all parts of the bottle you won’t need. All you need is the top part of the bottle next to its neck.
Take a cork and draw circles of 25mm diameter and cut out 4 circles with scissors.
It is especially important to use bent plastic next to the neck as it is the perfect shape for the lenses.
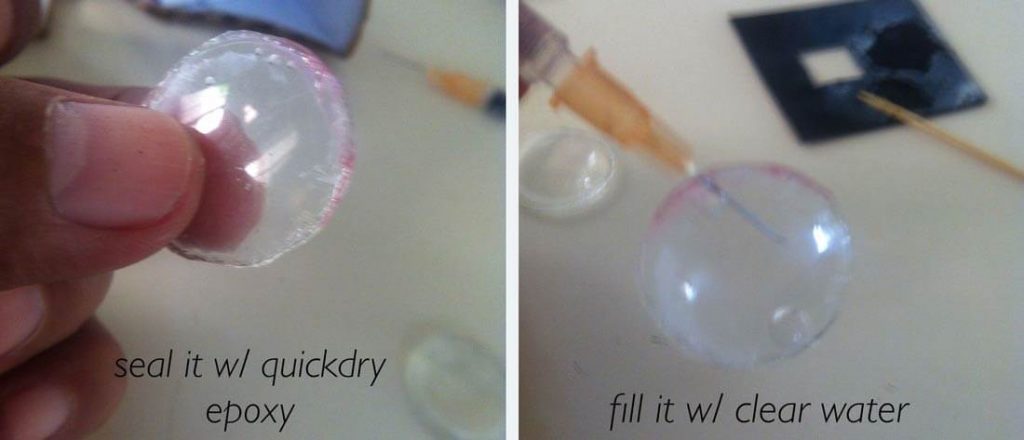
2. Making the lenses
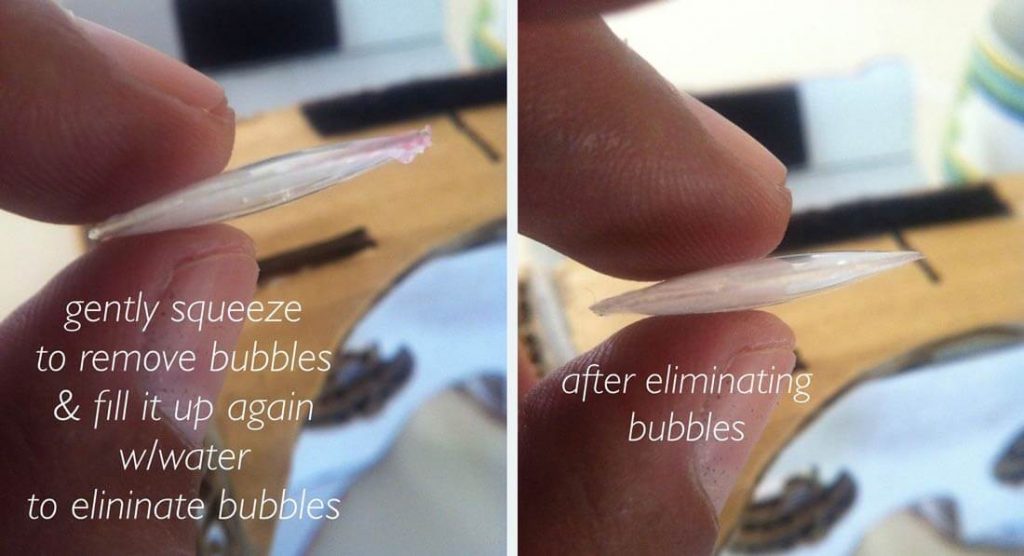
Now when you have 4 circles, glue two by two together, but leave a small air cup between them. Use hot glue to glue them together. Once glued, fill the lenses with water and press them a bit so there are no air bubbles inside of them. Then fill the hole with more hot glue.
Let them dry for a couple of minutes. Then test them if they’re magnified by placing them above a page with small printed letters.
Keep in mind that as the diameter of the lens increases, the magnification power of the lenses decreases. That is the result of the amount of curvature in the lenses since magnification power is a function of curvature. As the lens site increases, the curvature decreases, making for a lesser magnifying power.
That is the reason why higher magnification lenses are generally smaller than lower magnification lenses.
3. Make an enclosure for your DIY headset using Google’s Cardboard
This step is pretty simple, all you need is to make a box slightly bigger than your phone, and about 5 cm shallow.
– Download the template and print it on a large piece of paper in landscape mode
– Cut the template
– Attach the template to a cardboard (you can use a pizza box)
– Cut out the template
– Assemble it
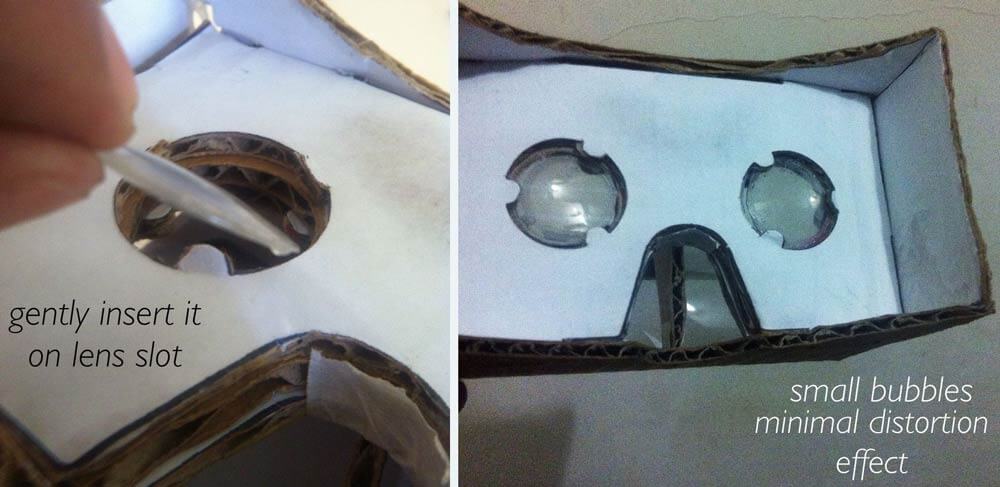
4. Attach the lenses
Now for the delicate and important part. Place the pair of lenses you made earlier onto the eye-slot of the assembled Google Cardboard Headset and glue them so they fit tightly.
5. Make a soft mask
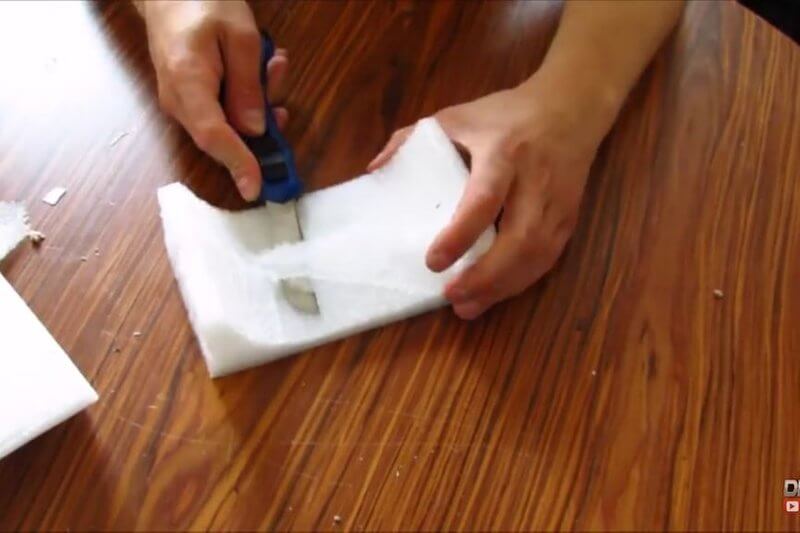
Believe it or not, you are almost there. The hardest part is well behind you and now for some finishing touches. Now you need to cut out a piece of foam so that you make a mask that will fit nicely with your face. Cut out the foam by making a place for your eyes, forehead and make holes for the eyes, then glue it onto a finished VR headset.
To box/unbox your mobile phone while inside the Cardboard you can put some Velcro strips or a simple rubber band.
Believe it or not, you are finished!
Test your final product by turning on some Virtual Reality app on your phone, or a 360 video and place your phone in. Enjoy!
If you would like to watch some videos of people assembling the headset, there are many available, but this one goes nicely with our guide.